 |
The steps were done along side the front panel repairs as it all ends up joining at the
seems on the inside and at the front edge, so although I have shown these pictures in this
sequence it might not necessarily be the order I did the repair on the camper.
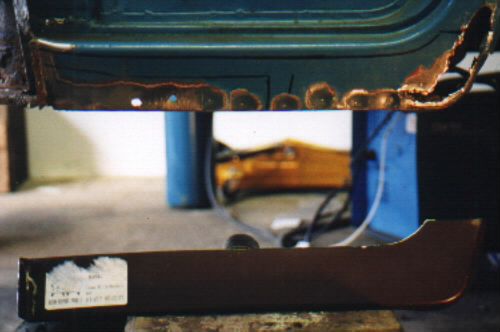
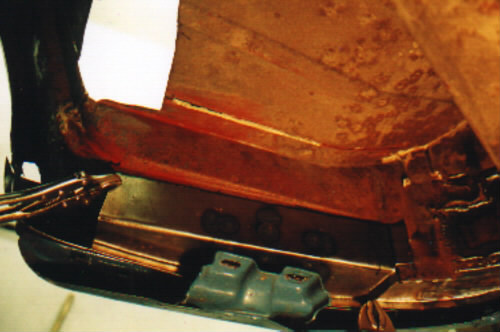
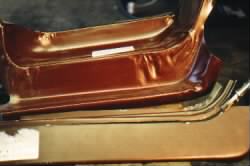
you can clearly see the holes at the corner of the step, and where the spot welds are
along the bottom flange you can see the distortion where it has rusted on the inside and gone very thin. for the first part of this repair
I have cut the repair panel so it just coves the area I wish to replace, I
then marked out the step where it would be lapped.
|
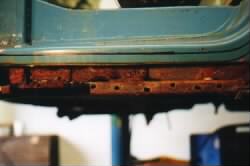 |
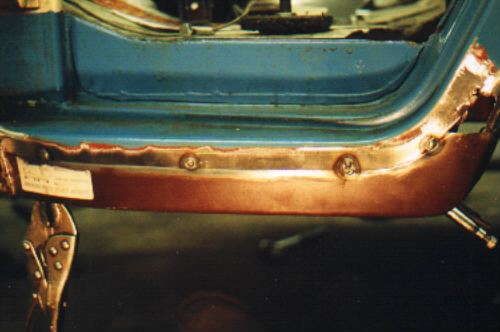
I carefully drilled through
the spot welds and then using a angle grinder I cut away the old panel about 10mm down from the
marked out position to allow for the lap.
you can now see the whole story! loads of rust. on this particular model and on early
bay-window models you have the added bonus of the bumper mounting bracket. this will also need repairing or replacing.
|
 |
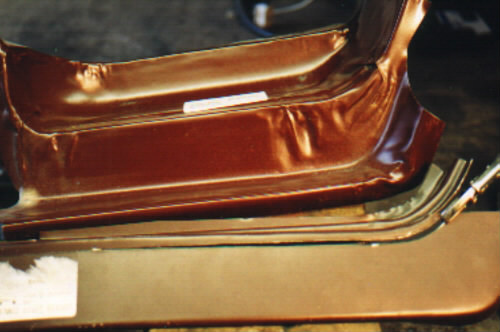
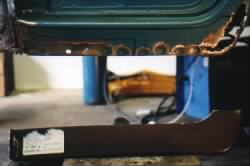
The repair panel has been lapped and then tacked into place,
I haven't fully welded it into place at the moment as it might have caused the repair panel to distort. the repair panel
doesn't go high enough to cover all the holes at the arch end, but at this point
I am only worrying about the step and once that is repaired the rest can then be patched as required |
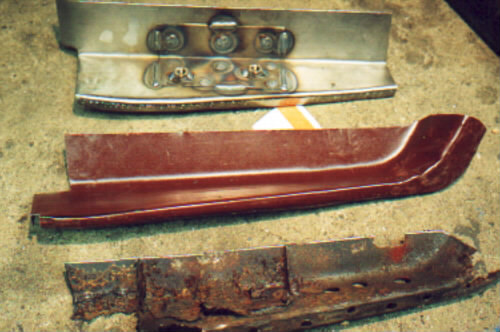
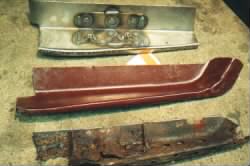
| Taking a step back I took this picture just to prove a point about the
quality of the pattern repair panels! Both panels are made from the wrong gauge of metal they are way to thin, and the shape and definition leaves less to be
desired.
On the two repair panels you get much more then is required which is
normally a good thing, but in this case the only panels that are available
are for the later model which had a step built into the floor of the cab instead of using the
bumper, hence the bumper mounting holes and reinforcement plate aren't included. |
 |
| In this picture it shows the cut down part of the
repair panel shown above, I had to do a lot of shaping to get it looking like that, but in the end
I decided not to use it! I decided to make up my own panel as you can see at the top which also includes the bumper mounting
reinforcement, and is made out of the right grade of metal, It doesn't include the arch area but this can be repaired
separately. The old panel (or what is left of it!) is also included for comparison. |
 |
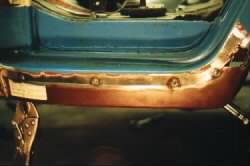
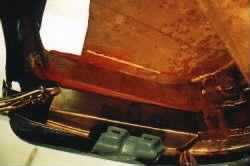
| I have cleaned up all the
flanges ready to weld the repair in place, the bumper is still fitted just
so I can make sure that the holes will line up, I removed it as soon as I
had tacked the repair in to place. My repair panel joins at the front at a
flange (you can just see the mole grips holing it in place) this is
how it should be, you might find if your van has been repaired in this
area that this flange is no longer present and has been welded over.
I didn't take a picture of the finished repair but there isn't much
more to see!, I just welded it in place! Oh and yes that is a big hole in
the floor!
|
 |