Page 17

Finishing of the O/S sill.

When I first started this repair I initially decided to only replace the bottom of the inner sill, but as the repair progressed if seem easier to do the whole lot. The part you can see in this picture is the middle section of the inner sill which fits directly behind the front section which I made up, as already described. the sill ended up being replaced in three main sections.

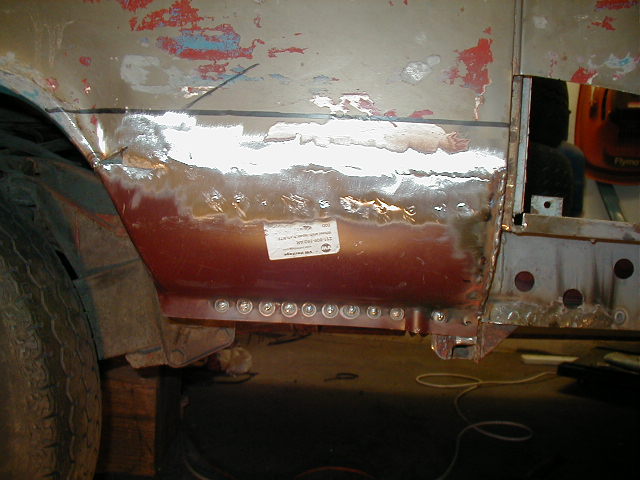
Because the inner sill was a pattern part it didn't include the step so I had to re-shape the edge before fitting it.

And here is the rear section of the sill which had to be slotted into place from within the wheel arch. You will also notice that there is a small section missing in the middle this was due to the pattern panel being to short and I then made it shorter by bending over the end as it should have been! (at the very end)

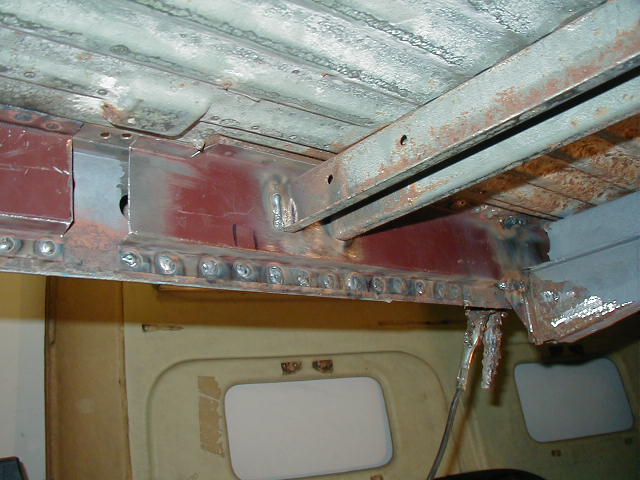
while I was going this end section I turned my attention to the rear cross-member and the rear jacking point, these were very rusty and I decided that I would replace them. But (there is a lesson here) before I cut the old ones out I check to see if I could get replacements and the answer in NO!

So I decided to make do with the rear outrigger and cross-member, but I did give all the inside sections a good coat of anti rust paint, (whilst they were open at the ends).

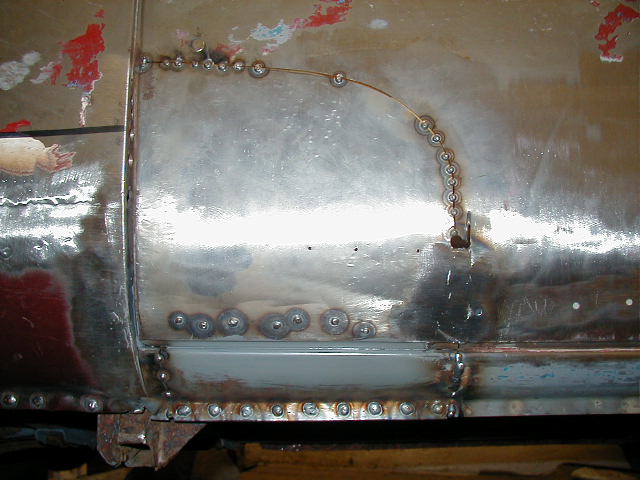
Looking on the outside again this is the new panel which I had already welded into place, I forgot to take pictures leading up to this so you cant see the repair I have made to the sandwiched section of the sill. This panel was a good fit but did require the end to be trued up and cut to size.

This little repair took a very long time! when I first decided to cut out the panel (to give me access) I was intending to remake the panel and fit it back. But this panel is not an easy shape, so with the help of a friend we trued it up as best as we could and welded it back into place. But even that wasn't easy as you come up against the problem of how the van was put together in the first place! Firstly I made up a end section of sill and welded that into place, then I made the main section of sill and welded this to the above panel, then I welded the two joined panels into place.

The last two pictures show the finished job! At the front I initially removed the bottom 8 inches of arch so I could repair behind it (you can just see the black dotted line) But before I welded it back into place the bottom 3 inches were replaced as it was rusted badly.

I was pleased with this side as I believe it is repaired to look like it should be, that is to say that the line at the back of the "B" post is continued to the bottom through the sill. On the other side I welded the sill to the "B" post and lost this line at the bottom.

Then to finish of the repair I welded the new front jacking point into place. When I phoned up about a replacement rear cross member I was told that you cant get then because the new vans are made with a combined jacking point and cross-member, or put it another way the rear cross-member has disappeared. But at least you can still get the front jacking point and should be able to for quite some time as it is used on the newly made vans.

Back

Index of repairs

Forward

Please feel free to e-mail me with suggestions or questions and I will try and oblige.

E-Mail me : fid@fid-tech-ltd.com

Links