
|
Page 13 |
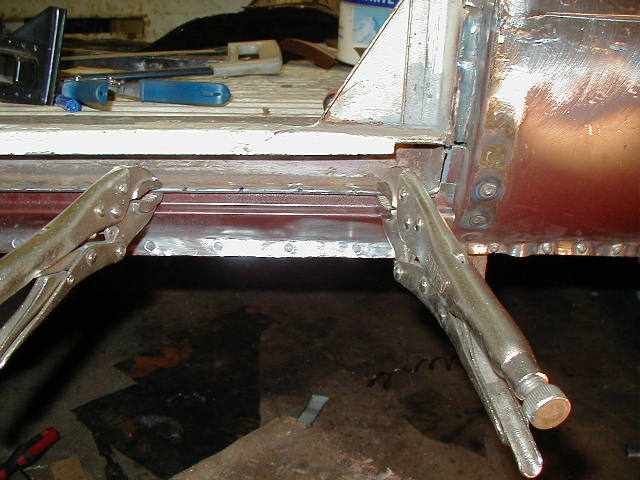
The sill last page! |
|
|
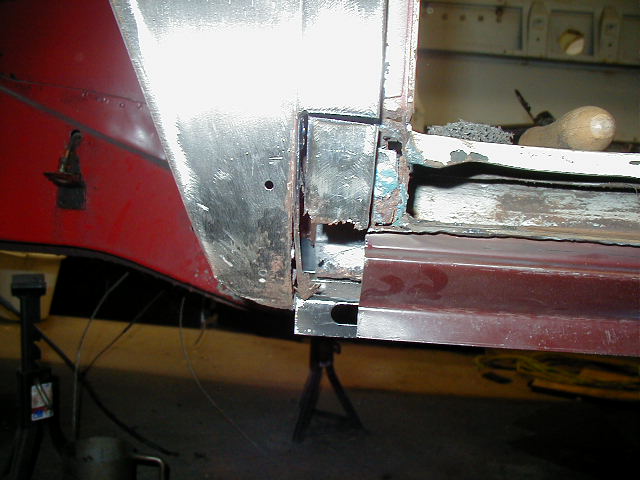
From the last page to this page, is a very large step. The bottom of the "D" post has been replaced and the sandwiched part of the sill has been repaired. To repair the "D" post took a long time, and was basically done by making up the panel in parts and welding the parts together before welding it back into place. |
|
|
To fit the new panel in this picture I first drilled holes along both the edges to be joined and welded a strip of metal along the inside of the fixed panel to give me a lapped joint. Also holes were drilled along the bottom edge to weld the panel onto the sill. |
|
|
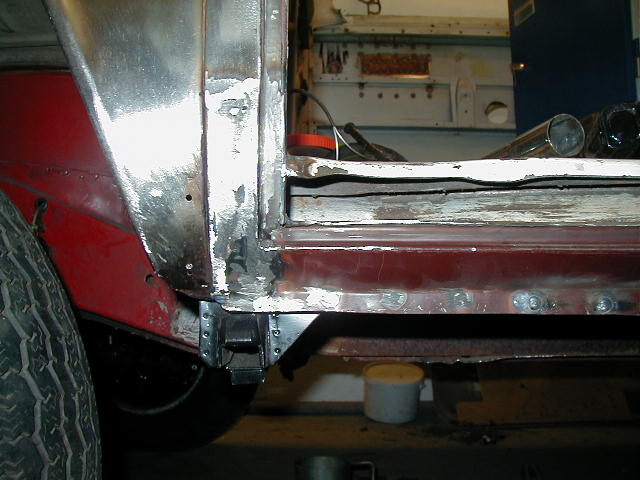
Once the new panel was finished , I then turned my attention to the new outer sill. The new sill was a pattern part but seemed to be a good shape. But by the end of the repair I did realize that it could have been done better as the new sill didn't have ends to it so I just welded it in. I think that it should have been folded over at the ends to carry on the line down the panel to the bottom. But having said that it doesn't look to bad and you don't spend all your time looking at the sill anyway. To weld the sill into place I drilled a series of holes along the bottom edge and along the door bottom I cut slots into the edge of the panel, in this way I could then weld from the top. (to see this you really have to look at the big picture) |
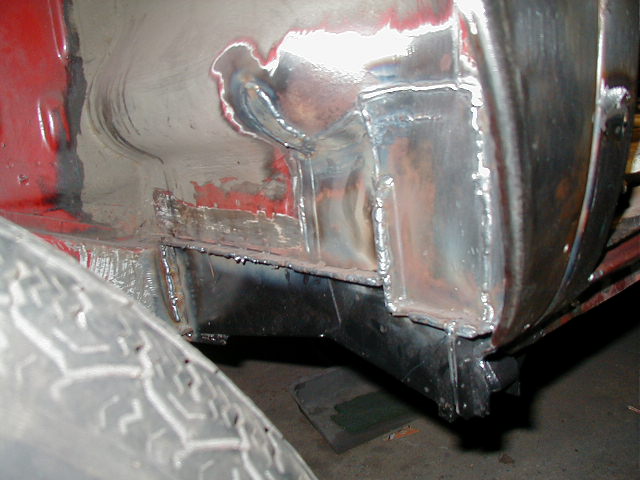
| At the front of the sill I had this nasty area where the bottom of the "B" post was missing, to help me reconstruct this area I had left the back of the wheel arch untouched to maintain the correct shape. looking at this picture I think that I repaired the "B" post before welding the sill into place so the pictures aren't quite in the right order! |
|
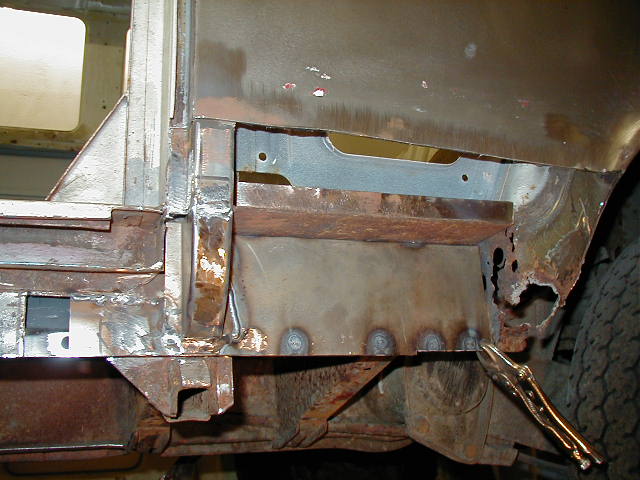
| With the "B" post repaired the sill has
now been fully welded into place, at the front of the sill it was welder in from behind
as the new inner sill had holes in it so I welded through them. And you can see where I
welded the sill to the "B" post, this is where I think the line from the back of the "B"
post should have continued to the bottom, but I am not sure. Another one of those time
consuming jobs was to reform the channel where the rubber door seal sits, this had to
be done at both ends.
You can also see that I have welded the new front jacking point into place this was simple to do and just required holes to be drilled along the edges of the new panel and then weld through. |
|
| This is the last picture of the N/S sill repair! This picture was taken some time after the major repair as the front beam and wheels have now been fitted back on. The final repairs are easy to do, all I did was just cut the plates and weld in the patches! although I did fold over two of the edges on one of the panels to form the "L" shape that you can see. |
|
|
|
|
Please feel free to e-mail me with suggestions or questions and I will try and oblige. |
|
 |